DESIGN YOUR OWN PAWN TICKETS AND CHEQUE CONTRACTS
The great thing about Dazzle is that you can design your own printed documents (pawn tickets, cheque contracts, etc) using Microsoft Word and meta-fields, using just ordinary plain white paper for your printer.
META-FIELDS
Meta-fields are placeholders for real information. In a template, any place that you see a meta-field, data from Dazzle Pawn goes in its place. This may sound a bit complicated, but it's actually quite simple.
For example, presumably you need to put the customer's name and address on all your contracts. This would be tedious if you manually had to do this for every ticket, but meta-fields can do this for you automatically like this: In your contract design you could insert this . . .
|
Customer Name & Address: |
Here you can see a heading that reads Customer Name & Address:. As you can see, there's nothing special about that, it will print out exactly as you see it.. The next part, on the other hand, is special because it contains our meta-fields. In almost all cases, meta-fields begin and end with !! . It's what makes them easily identifiable.
When printing this document from Dazzle Pawn for a customer named John Smith, who lives at 55 Pine St, Chicago, IL 60601, it would print looking like this:
|
Customer Name & Address:
|
As you can see, the !!FIRSTNAME!! meta field was filled in with John,. Dazzle Pawn intelligently substituted it for you. In the same way, !!LASTNAME!! was replaced with Smith, and the !!CUSTOMERADDRESS!! was replaced by the correct address. With each customer, Dazzle Pawn automatically looks at these meta-fields and will fill in these meta-fields in the same way.
An important thing to note with meta-fields is that they may be smaller than the actual information that is used. For example, !!CUSTOMERADDRESS!! could be as short as 1 Pine St, or it could be as long as 35010 West Mississippi Harbor Lane, apt 109B. . When creating your own template, you will need to account for this by allowing enough spacefor what will go in that spot.
Now that we understand what a meta-field is, and how it works, let's get to the template.. A template is simply a pawn or cheque contract that contains all the correct information, but which contains meta-felds where the data will go. Dazzle Pawn comes installed with a package of sample templates that are located in C:\DAZZLE PAWN\COMMON\TEMPLATES. As you can see, their names all end in .rtf. You can open up these files with Microsoft Word, and you'll see what looks like a typical form, but in the place of actua data are the meta-fields we've been discussing.
When you look at one of these samples, you'll also notice that everything is formatted very carefully. In order to make the printed page look exactly right, the templates are carefully formatted using tables . An example table would look like this:
|
CHEQUE No. |
!!CHEQUENO!! |
CHEQUE AMOUNT |
!!CHEQUEAMOUNT!! |
|
DRAWN ON: |
!!DRAWNON!! |
OPENING FEE |
0.00 |
Essentially, a table is a box (with or without visible lines) that helps format what's inside of it. It helps retain the spacing, and keeps everything nice and clean looking. In the example above, if the Cheque No. was 5555555, then everything wouls fit properly in our table. CHEQUE AMOUNT would stay exactly where it is now, along with everything else. However, if the Cheque No. was something like 5555555555555555555555555555555555555555, it obviously would not fit.. This is why you must allow for what information is going to be put in place of the meta-fields.
There are a lot of different things that can be done with a table, much more than this tutorial can manage. For more information on how to use and format tables to fit your needs, please look up Tables in Microsoft Word's help file. You can create tables of any shape and size you like in Word.
Now you can begin making your own template. You could start with one of Dazzle's ready-made samples, and alter it to your liking, or start fresh. No matter which way you go, you will need to start off using Microsoft Word. Using Microsoft Word, you will arrage the text and the tables so everything is positioned where you want it. Once you have everything up to your standards, you must save your document as a Rich Text File, or .rtf file. To do this, you click on Save As. When it says File Name:, you enter a name for your template (ie: My pawn contract). Where it says Save as type:, you select Rich Text Format (*.rtf).
The lastt step is to open up WordPad and use it to open the template you just saved. Once you've done that, what you need to do is make a minor change to your template. This could be adding a space after a meta-field, or even just a period. Anything that won't mess up the look of your template, but will alter it. Once you've done that, click save . Congratulations, you've successfully made your first template!
You may be confused why you needed to make a minor change. The reason is, Microsoft Word is great for formatting, but it adds a lot of invisible junk to your template that may mess with Dazzle Pawn. By opening your template in WordPad, making a minor change, and then saving it, you get rid of all that invisible junk automatically.
SAMPLE CONTRACTS INCLUDED WITH DAZZLE
Included with Dazzle are these sample templates:
UK 3 rd party Cheque Agreement.rtf
UK 3 rd party Cheque Agreement.rtf (style 2)
UK Buyback Agreement.rtf
UK Buyback Agreement slip printer.rtf
UK Cheque Agreement 28 day deferred.rtf
UK Cheque Agreement Next Day.rtf
UK Cheque PRE-Agreement 28 day deferred.rtf
UK Cheque Sample Agreement 28 day deferred.rtf
UK DPC Cheque Agreement.rtf
UK DPC Cheque PRE-Agreement.rtf
UK DPC Cheque Sample Agreement.rtf
UK Pawn Agreement back.rtf
UK Pawn Agreement front.rtf
UK Pawn Sample Agreement.rtf
UK Purchase Receipt.rtf
IMPORTING YOUR TEMPLATE INTO DAZZLE PAWN
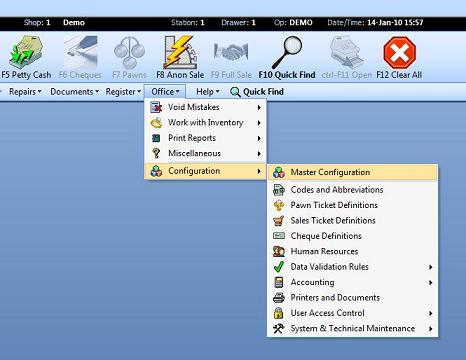
In order to import your template into Dazzle Pawn, select Office from the menu go to Configuration > Master Configuration.
From the Master Configuration screen, click on the tab that says Custom Tickets.
In this tab, you will see a section for pawn contracts and a section for cheque contracts. Both of these sections work the same way.
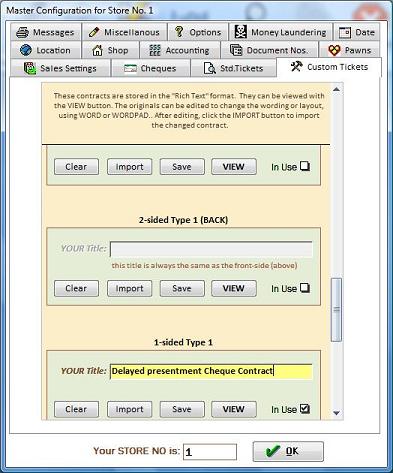
For our example, we'll be working with the third box in the cheque contracts section that is labeled 1-sided Type 1 . Into this box, you are going to import your template. Click the import button and browse for the appropriate .rtf file (eg: "My pawn Contract.rtf"). When you find it, click on it and then click the Open button.
The file will be loaded into Dazzle. Then you should manually type in your title into the field labled YOUR Title. The title that you enter here will replace the !!TITLE!! meta-field in your documents, (It will print on every ticket) so make sure to make it meaningful. Upon completing this, click the OK button.
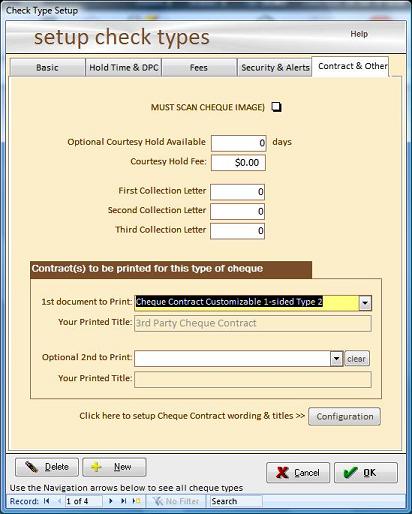
To use your template for a cheque, you must go to Office > Configuration > Cheque Definitions and using the small arrows at the bottom left, navigate to the type of cheque for which you want to use this contract. Click on the Contracts tab at the top, and in the field labeled First Document to Print, select Pawn Contract 1-sided Type 1. Click OK to save. Dazzle will now use your template to print your cheque contracts..
You can find a complete list of all the available meta-fields here. You can use as many of them as you like in your template design.